Overview#
This post includes instructions for:
- Creating and submitting a new post
- Writing your markdown post
- Including images
- Local rendering
- Including math
Creating a new post#
Blog posts are written in plain text markdown language (see here for a nice introduction). You can write and submit posts in the following ways:
- write a new post in a github issue
- write a new post in a github pull request
- write a new post and send the markdown file and images to Chris
submission via issue#
Start a new issue and title it New Post: <your title>. Write your post directly in the issue! You can upload images and write in standard markdown. When ready, click Submit New Issue and a maintainer will help to get port the post over to a pull request.
submission via pull request#
Fork the repository and clone it locally.
Each blog post has its own folder in /content/blog/. Once the markdown folder is merged into the github repository, it will automatically get picked up and rendered. So to write a new post, you need to:
- create a new branch for your post:
$ git branch -b my_new_post
- add a new folder to
/content/blog/, for example:/content/blog/my_new_post/ - add a new
index.mdfile in your new folder. Note that this files requires a particular style of markdown preamble. - write your post in the markdown file.
- commit your
index.md(and any image files that you added). - push your branch to your fork and open a pull request!
submission via email#
Write your markdown post then email (or attach in a slack message) the markdown file and any image files to Chris.
Writing your markdown post#
Your blog post should be written in a single plain text markdown file. If you are submitting via pull request, you should name that file index.md in the correct directory. Otherwise, you can name it anything you want with a .md extension, and it will be renamed to index.md on final upload to the website’s repository.
Your markdown file will consist of 2 general sections: the preamble and body. The preamble includes a bit of markdown code related to how the website picks up posts during rendering while the body is where your post goes.
markdown preamble for posts#
For a new post to get picked up, the index.md must have a particular block of code called the preamble. At the top of the index.md file, paste the following and edit:
+++
title = "Your blog post title!"
date = "2020-11-14"
+++
And that’s it! You’re now ready to write your post in the rest of the index.md file.
markdown body for posts#
The rest of the index.md file is where your post goes! If you’re new to markdown, check out this guide for a nice introduction or check out the source code for this post to see some examples for headers, links and more.
Including images#
To include images that exist somewhere on the web, you can use

To include images that exist locally:

The correct /path/to/your/image will depend a bit on how you are submitting your post. If you are writing locally with intent to submit via email or in a github issue, the paths don’t matter so much as they’ll be changed for final upload by the repository maintainers.
If you are writing your blog post locally to submit as a pull request, you’ll have a couple extra steps. First create a folder in /static/images/blog/ for your post and add your images to that folder. Then to embed the images in the markdown, you’ll reference the images with:

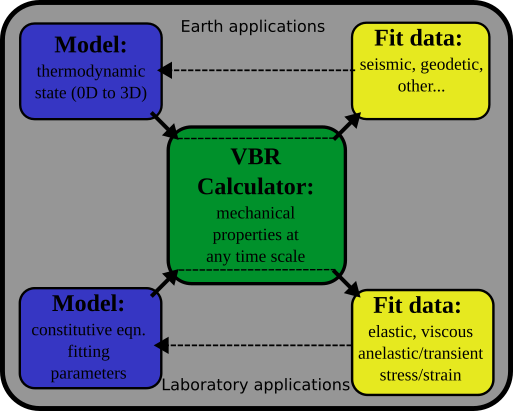
Note that the image path must start with /images/, not /static/. For example, for this post, there is a corresponding folder, static/images/blog/submitting-posts/ where the VBRsimpleFlowchart.png figure exists. To add it here:

Local rendering#
If you want to see what your new post will look like when it’s fully rendered, you’ll need to set up a development environment for the blog.
First, install hugo extended edition following instructions at gohuo.io (note that the hugo theme we use here requires the extended, not the standard hugo!).
Now, fork https://github.com/iSTRUM/iSTRUM.github.io and clone your fork locally, being sure to enable initialize submodules:
$ git clone --recurse-submodules git://github.com/YOURUSERNAME/iSTRUM.github.io.git
Now you should be able to locally build and serve the full website with:
$ cd iSTRUM.github.io
$ hugo server
after which the website should be avaialbe to view at http://localhost:1313.
Including math#
The blog allows mathjax expressions (very similar to latex). Note that if you’re writing your post as a github issue, the math will not render in preview mode.
For equation blocks, you wrap with $$.
for example
$$ x = \phi $$
renders as
$$ x = \phi $$
For multi-line, aligned equations use eqnarray with &=& to align around the =. Separate lines with \\\\:
$$
\begin{eqnarray}
\frac{\partial{T}}{\partial{t}} + V \cdot \nabla{T} &=& \kappa \nabla ^2 T \\\\
\rho \frac{DV}{Dt} &=& - \nabla p + \eta \nabla^2 + \rho g \\\\
\nabla \cdot {V} &=& 0 \\\\
\end{eqnarray}
$$
renders as
$$ \begin{eqnarray} \frac{\partial{T}}{\partial{t}} + V \cdot \nabla{T} &=& \kappa \nabla ^2 T \\ \rho \frac{DV}{Dt} &=& - \nabla p + \eta \nabla^2 + \rho g \\ \nabla \cdot {V} &=& 0 \\ \end{eqnarray} $$
For inline equations, use \\( and \\). So \\(x=\phi\\) will render as \(x=\phi\).